Our Best Sellers


About Us
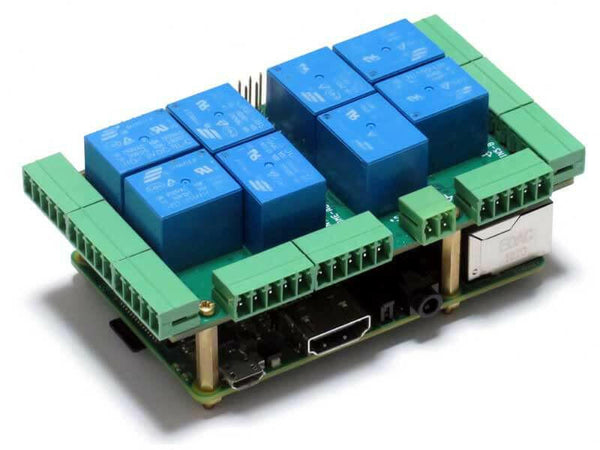
Sequent Microsystems designs and manufactures I/O Cards for Raspberry Pi. We expand the capabilities of Raspberry Pi with analog inputs and outputs (0-3.3V, 0-10V, 4-20mA), optically isolated inputs from 3 to 240V AC or DC, 4 to 16 on-board relays and solid state outputs, event counters, quadrature encoders, 1K/10K thermistors, RTD sensor inputs, Real Time Clock with battery backup, RS485/MODBUS communication, MOSFET and TRIAC load drivers. All our cards use only the I2C port for communicating with Raspberry Pi, leaving all the GPIO pins available for other tasks. Three Sequent cards (Home, Building and Industrial Automation) are "Swiss Army Knife" types, packing all the possible functions in the available space. If extra functionality is desired, each card can be stacked up to eight levels. Additional universal inputs, relays or solid state outputs can be added using compatible cards. Up to eight cards of each type can be installed in any combination on a single Raspberry Pi. Build-in hardware watchdogs on all our "smart" cards can cycle the power on Raspberry Pi to ensure that mission critical projects recover if Raspberry Pi locks up. All cards use reliable and convenient pluggable terminal blocks and brass mounting hardware. The connector plugs are rated at 8A/300V, accept 28 to 16 AWG wires and offer the most flexible and reliable way of wiring Industrial or Home Automation controls. The Sequent Raspberry Pi family is completed by a Super-watchdog with Li-Ion battery backup, which can keep the system running on battery for hours in case of power failure, and can notify you via email or SMS when power fails and comes back up. A stackable Smart Fan with proportional fan control which can keep the Raspberry Pi at a preset operating temperature.