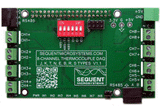
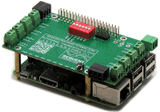
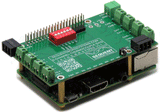
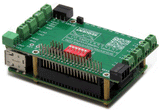
FEATURES
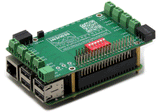
- Eight Thermocouples DAQ 8-Layer Stackable HAT for Raspberry Pi
- Supports Thermocouples type J, K, T, N, E, B, R and S
-
24 bit delta-sigma A/D converters
- Ultra-low drift (0.005µV/ºC) low offset (50µV) amplifiers
-
Factory accuracy: 1%
-
Maximum accuracy (through calibration): 0.1%
- Cold junction compensation
-
Maximum acquisition speed 40 cps
-
RS485/MODBUS transceiver with in and out ports
-
Programmable threshold LEDs on all inputs
-
Pluggable Connectors 26-16 AWG wires for power and RS485
-
On-board hardware watchdog
-
Reverse polarity power supply protection
-
General Purpose Pushbutton
-
On-board resettable fuse
- Uses only I2C port, all GPIO pins available
- Works with any Raspberry Pi from ZERO to 5
-
Command line
-
Python library
-
Node-RED example
-
Modbus RTU
- CODESYS Driver
- OpenPLC module
- ECCN Code EAR99
- ERRATA: Polarity reversed on channels 5-8 silkscreen for VER2.0
3D FILES
8-THERMO DAQ HAT 3D STEP MODEL DOWNLOAD
8-THERMO DAQ HAT WITH RASPERRY PI STEP MODEL DOWNLOAD
DESCRIPTION
Eight Thermocouples Data Acquisition HAT for Raspberry Pi
Compatible with all Raspberry Pi versions from Zero to 4, this card offers a compact and inexpensive solution for reading and storing data from up to 64 thermocouple temperature sensors. Using 24 bit delta-sigma A/D converters with four channels each, the card achieves better than 0.1% accuracy. Field calibration with a precision 100Ω resistor can lead to 0.01% precision.
COMPATIBILITY
The card is compatible with all Raspberry Pi versions from Zero to 5. It shares the I2C bus using only two of the Raspberry Pi’s GPIO pins to manage all eight cards. This feature leaves the remaining 24 GPIOs available for the user.
POWER REQUIREMENTS
The 8-Thermocouple DAQ Card needs 5V to operate and can be powered from Raspberry Pi or from it's own pluggable connector. The cards needs 50mA to operate.
LED INDICATORS
The 8-Thermocouples DAQ board has eight LEDs that can be activated when the input reaches a preset threshold. The threshold can be set in software for each input.
DIP SWITCH CONFIGURATION
A six position DIP switch is used to select the source of the RS485 port and the position of the card in the stack, if multiple cards are used.
STACKING MULTIPLE CARDS
Up to eight cards can be stacked on your Raspberry Pi. The three right positions of the DIP Switch are used to select the stack level.

RS485/MODBUS PORT
The Card has an RS485 port which can be driven from the Raspberry Pi. Set both to ON to connect the RS485 port to USART1 of the Raspberry Pi.
When DIP Switches are ON, Raspberry Pi can communicate with any device with an RS485 interface. In this configuration the card is a passive bridge which implements only the hardware levels required by the RS485 protocol.
When DIP Switches are OFF, the Raspberry Pi GPIO pins can be used for other functions. If multiple cards are stacked, only one card can have the DIP Switches ON.
RS485 TERMINATOR
The first position on the DIP switch is the RS485 line terminator. Set it to ON if the card is last on the RS485 chain.
REVERSE POWER SUPPLY PROTECTION
The board is protected to accidental reverse power supply with a 5.8A, 39 mOhm MOSFET which breaks the ground line if reverse power is applied.
RESET PUSHBUTTON
Shutting down the Raspberry Pi by turning off the power can result in SD Card failure. To prevent this, a shutdown command needs to be used before power cut-off. But this requires a monitor, keyboard and mouse connected to the Pi.
A momentary on push button installed at the edge of the board provides a convenient way to shut down the Raspberry Pi. The button is routed to pin 37 (GPIO 26). You need to write a script which monitors this pin, and if pressed for more than a desired time, issues the shut-down command.
CARD LAYOUT
MECHANICAL SPECIFICATIONS
DOWNLOADS
8-Thermocouples DAQ Downloads
SOFTWARE
SOFTWARE INTERFACES
You can write your own Data Acquisition system in C, C++, PERL or the language of your choice using the Command Line functions or the Python Library. A browser interface can easily be deployed using Node-Red.
FIELD CALIBRATION
Field calibration to 0.1% precision can be achieved using an external high precision voltage reference. Software commands permit the user to calibrate the card in two points (the 2 points must be as far as possible but inside the measurement range).
RS485/MODBUS Communication
The card contains a standard RS485 transceiver which can be accessed by the local processor or by Raspberry Pi. The desired configuration is set from two bypass DIP switches. If switches are in the ON position, Raspberry Pi can communicate with any device with an RS485 interface. In this configuration the card is a passive bridge which implements only the hardware levels required by the RS485 protocol. To use this configuration, you need to tell the local processor to release control of the RS485 bus:
~$ smtc 0 cfg485wr 0 0 0 0 0
If switches are in the OFF position, the card operates as MODBUS slave and implements the MODBUS RTU protocol. Any MODBUS master can access all the card's inputs, and set all the outputs using standard MODBUS commands. A detailed list of commands implemented and parameters addresses can be found on GitHub:
In both configurations the local processor needs to be programmed to release (jumpers installed) or control (jumpers removed) the RS485 signals. See the command line online help for further information.
FIRMWARE UPDATE
The card firmware can be updated in the field by running a command. The update is made with the latest firmware version located on our servers. More instructions about the process can be found on
GitHub. Please make sure there is no process, like Node-Red or python scripts, that tries to access the card during the update process.
ACCESSORIES
DIN-RAIL MOUNTING
YOUR KIT
1. 8-Thermocouples DAQ HAT for Raspberry Pi
2. Mounting hardware
-
Four M2.5x18mm male-female brass standoffs
-
Four M2.5x5mm brass screws
-
Four M2.5 brass nuts
4. All female connector plugs
QUICK START
-
Plug your card on top of your Raspberry Pi and power up the system
-
Enable I2C communication on Raspberry Pi using raspi-config.
-
Install the software from github.com:
-
~$ git clone https://github.com/SequentMicrosystems/smtc-rpi.git
-
~$ cd /home/pi/smtc-rpi
-
~/smtc-rpi$ sudo make install
-
~/smtc-rpi$ smtc
The program will respond with a list of available commands.


